Inside David's Head
Wanna really see what's inside my head? Well, try not to get too grossed
out! I created the movies below from anatomical data collected from a
magnetic resonance image (MRI) scan. Special thanks goes to Sarah Creem for
letting me participate in her psychology study, and for letting me get my
hands on some of the resulting data.
Each of the MPEG movies below has a pretty good frame rate. The animated gifs
are worse quality, but can be viewed by most browsers.
Also see my eye surgery page for cool
topological images of the surface of my eye.
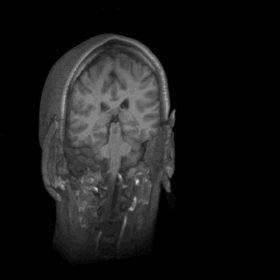
A couple notes about this and the other pictures:
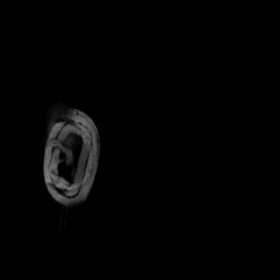
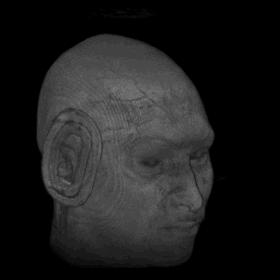
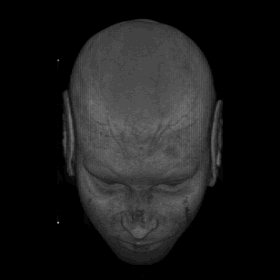
First, my ears aren't really that big -- what you see
is the foam from the ear protection I wore. (The MRI machine is loud!) You
can faintly see the LCD goggles I was looking at during the experiment.
The "wood grain" look of my head is a result of combining the
multiple layers of data that the MRI machine takes. Also, I haven't shaved
my head -- hair doesn't show up on the MRI.

|
The brief darkening half way through is
the corpus collosum, the area between the hemispheres of the brain
that doesn't have any tissue.
|
|
Watch the eyes and teeth.
|
|
|
|
I think this is the most disturbing.
|

Single cut, 3/5 of the way to the back, rotating.
MPEG (.87 MB)
Animated GIF (438 KB)
Shows some suprisingly large cavities behind the ears.
|
How these movies were created
In case you were interested, here are the details on creating the movies:
- Get AFNI,
Image Magick, and
Berkeley
mpeg_encode
- Get the raw data. (+orig.BRIK and +orig.HEAD) files.
- Run AFNI's 3daxialize on the data, creating a axialize+orig.BRIK and
axialize+orig.HEAD files.
- Run AFNI's 3ddup on the axialize data to create dup+orig.BRIK and
dup+orig.HEAD
- Start AFNI, select "Warp on Demand" and write the anatomical data to
the disk.
- Select the Render Dataset plugin from the Define Datamode panel.
- Choose the dataset, and set the top of the histogram to something
reasonable.
- Set up the automated rendering (see below), generate the images, and
save them.
- Run my makempeg.pl script to brighten the image and create the movie using mpeg_encode.
- Use any good image processing program to convert the images to an
animated gif. I wrote a script
(makebmps.pl) to convert every fourth
image into a bmp, which I then slurped into a Windows animated-GIF tool. Be
sure to optimize the GIF, which will reduce the size by about two-thirds.
(Settings: 4 colors, .15 seconds per frame, 1.5 seconds on last frame.)
The equations used to make the movies are below. Roll=35 Pitch=100 Yaw=0,
frames=150 unless otherwise noted. X+, X-,
Y+, Y-, Z+, Z- indicate the
extremes of the images. You can get them from the main AFNI panel.
Rotate:
Roll: 360*t/N
Wedge:
Expr > 0: -10*x+8*(z-Z++t*(Z+-Z-)/N)
AND
Expr > 0: 10*x+8*(z-Z++t*(Z+-Z-)/N)
Top to bottom:
Superior: Z+-t*(Z+-Z-)/N
Roll: 0
Pitch: 130
Top to bottom slice:
Superior: Z+-t*(Z+-Z-)/N+4
OR
Inferior: Z+-t*(Z+-Z-)/N
Roll: 0
Pitch: 130
Right to left:
Right: X-+t*(X+-X-)/N
Right to left slice:
Left: X++t*(X+-X-)/N+4
OR
Right: X++t*(X+-X-)/N
Front to rear:
Anterior: Y-+t*(Y+-Y-)/N
Roll: 45-90 * t/N
Front to rear slice:
Anterior: Y-+t*(Y+-Y-)/N
OR
Posterior: Y-+t*(Y+-Y-)/N+4
Roll: 0
Cavity:
Anterior: Y-+3/5*(Y+-Y-)
Roll: 40-t*80/N
 Back to David Coppit's Homepage.


